Maxon Modifications
HCB-40WX:
1. Remove the bottom covers from the unit and locate the Microprocessor circuit board as shown above. Remember to remove the screws inside the battery compartment before prying the unit apart. Unsolder the small metal shield taking careful note of its position.
2. Unsolder and move the two small chip resistors R01 & R02, to the positions R03 & R04, as shown inthe diagram above. These chip resistors are easily damaged so be sure to use a low wattage variable temperature soldering iron for the job. Zero Ohm chip resistors can be replaced with a simple solder bridge if necessary.
3. Re-assemble the unit and use the "CH9" button to change bands.
MCB-45WX:
<RV101-Sq Range, RV201-AMC, RV202-TX Meter, RV401-RX Meter, Q7-AMC Defeat>
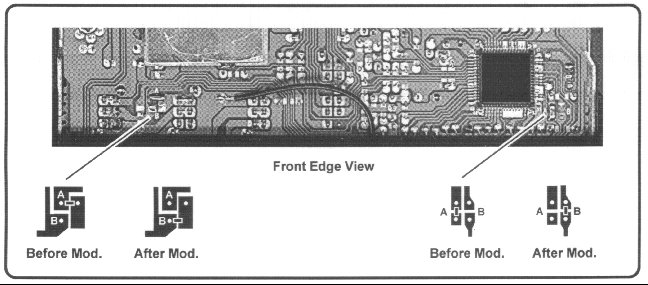
1.Remove the covers from the unit and locate the Microprocessor MX chip.
2. Unsolder the bridges from the" A " Traces and re-solder the bridges across the pads marked " B " , as shown in the diagram above.
3. Re-assemble the unit and use the "CH9" button to change bands.
MCB-100 WXD:
<RV1-RX Meter, RV2-Sq Range, RV4-AMC, RV5-TX Meter>
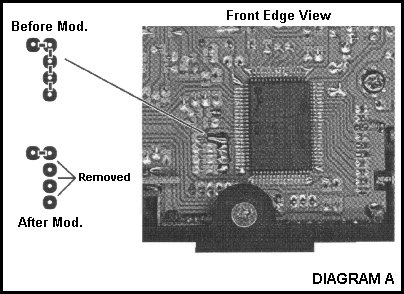
1.Remove the covers from the unit and locate the Microprocessor MX chip.
2. Unsolder the bridges from the three traces shown in diagram A, Make sure that these traces are individually soldered but together. Adjust the VCO coil L10 if necessary to lock in all frequencies.
3. Re-assemble the unit and use the "CH9" button to change bands.